 Castlevania Guide Database
Walkthrough 14: Ceremonial Room
The Ceremonial Room is the last area. Here you must defeat both forms of Dracula back to back to rescue your kidnapped master.
Goals
- Defeat Dracula
Key Points
- After defeating the first form, you can leave to save and heal.
- Once you enter the beam of light to fight the second form, there’s no turning back. Defeating Dracula clears the game.
Max-ups

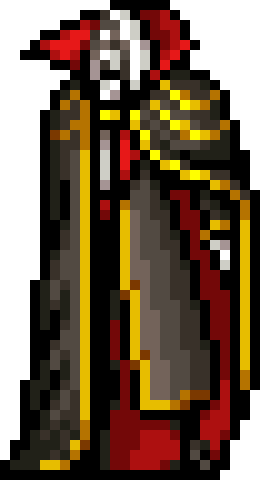
Boss: Dracula
ドラキュラ
“Sealed off from this world by Nathan's parents and Morris, he is attempting to reemerge after 10 years of confinement.”
- No.
- 113
- HP
- 1100
- EXP
- 150000
- ATK
- 805
- DEF
- 850
- One-hit STR
- 3058
- Element
- Dark
- Clock (normal use)
- No effect
- Clock (Item Crush)
- Slow
- Freeze
- No effect
- Petrify
- No effect
- Quake
- Works
Attacks
| Attack | Power | Element | Status ailment |
|---|---|---|---|
| Contact It only has a hitbox while attacking and hurts on contact. If it teleports right onto you, the first frame of its attack will hit you. | 805 | Dark | — |
| Bats (Red) 3 at a time, flying out of its hands in high, middle and low rows and moving slowly straight ahead. Jump to avoid them. | 850 | Fire | — |
| Bats (Blue) Two in succession: the first at waist height (crouch to avoid), the second skimming the floor (jump over it). They speed up as they fly. | 750 | Ice | — |
| Bats (Yellow) Raises its hand especially fast. Fires 31 in all directions in succession. In front of it you need to be more than half a screen away to dodge, using two separate jumps (not a double jump) or one jump followed by a crouch. Since you need distance, run toward open space when it appears. | 800 | Thunder | — |
- For damage, the rules for kills while frozen or petrified, and how drop rates work, see Game Systems
Strategy
- Recommended sub-weapon: Crucifix.
- Recommended DSS: Electric Healing; the yellow bats are thunder element, so with it on they're harmless. Summoning Thunderbird and the like also works.
- It teleports in a pillar of light, appearing randomly within about the middle half of the screen, and attacks there about 2 s later. It can only be hit while attacking.
- The three attacks are each used once per cycle, in random order. The yellow bats come with an especially fast hand raise; red and blue are equally slow, so you can only tell them apart by the bat color.
- You can dodge red and blue bats by jumping behind it, but in case yellow bats catch you off guard, it's better to face it head-on if you don't have Electric Healing.
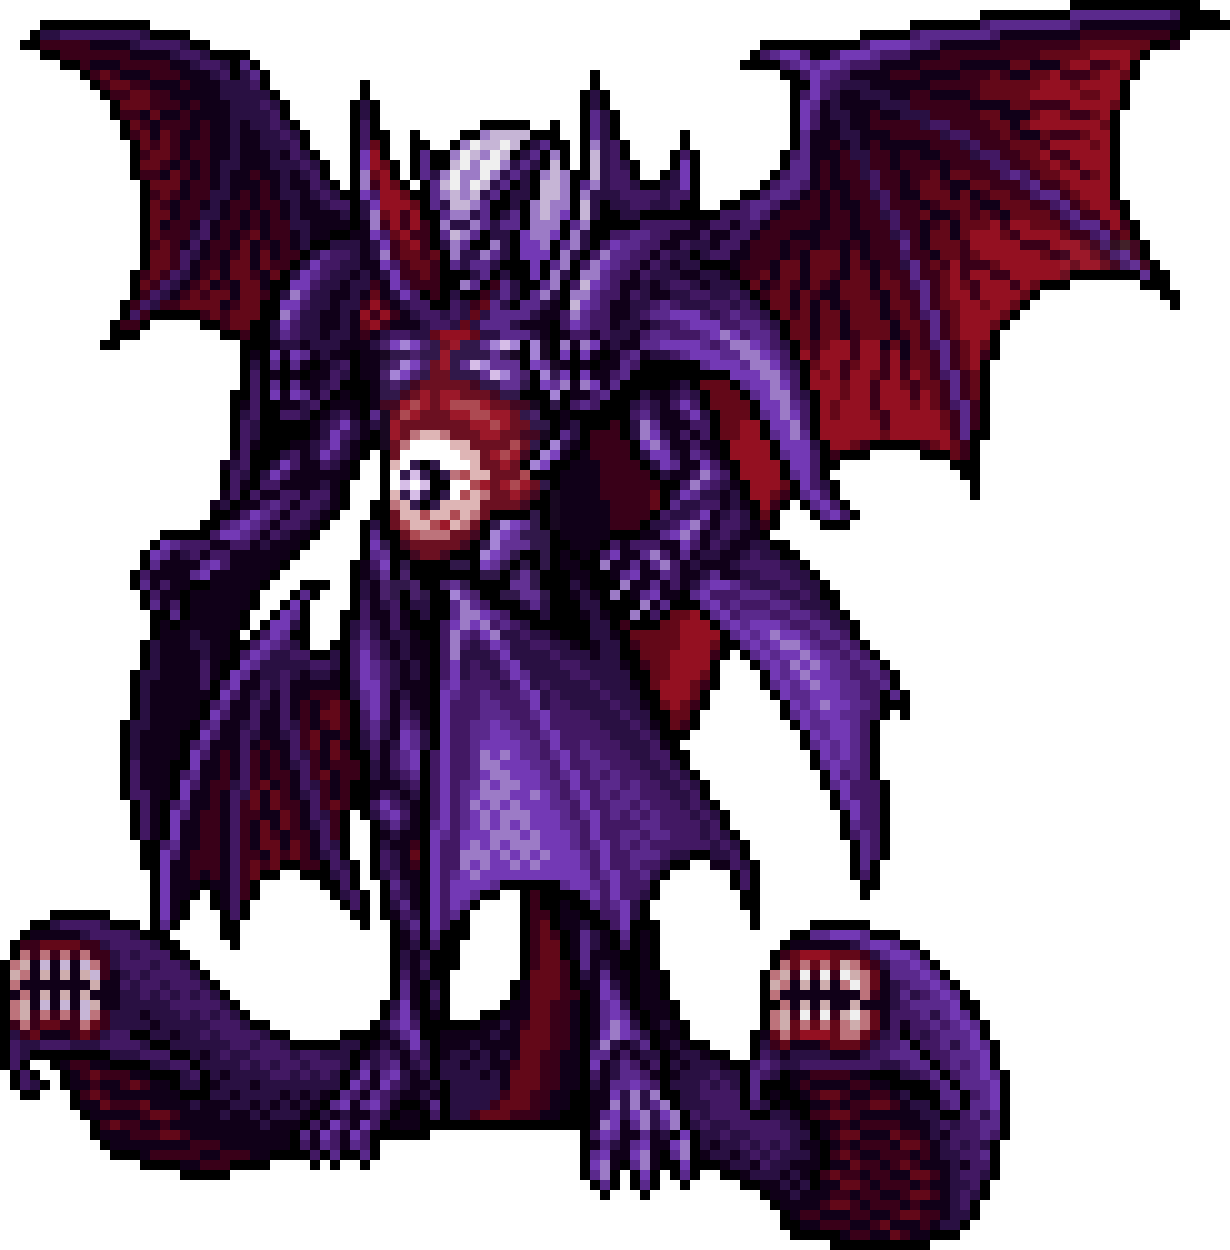
Final Boss: Dracula (Second Form)
ドラキュラ(第二形態)
“The lord of darkness and ruler of all evil.”
- No.
- 114
- HP
- 3000
- EXP
- 0
- ATK
- 1000
- DEF
- 1000
- One-hit STR
- 5478
- Element
- Dark
- Clock (normal use)
- No effect
- Clock (Item Crush)
- Slow
- Freeze
- No effect
- Petrify
- No effect
- Quake
- No effect
Attacks
First Phase
| Attack | Power | Element | Status ailment |
|---|---|---|---|
| Contact | 1000 | Dark | — |
| Blood Cells Spits 12 from the mouths at its feet in alternation; they pause, then slowly drift after Nathan and poison on contact. Can be destroyed with the whip flail. | 1000 | Poison | Poison |
| Laser Fires 4 beams alternately from both sides of the eye, each re-aiming at Nathan: it lands about 2/5 of the screen width in front of you, then sweeps outward to behind you. Afterward a wall of fire about half a screen wide rises from the floor. The fire can't reach platforms, so jump onto one to dodge it. If it appears beside a platform, you only need to dodge the laser. | 1500 | Fire | — |
| Meteors 15 fall diagonally from the top of the screen and from behind it, equally dangerous everywhere. Meteors are stone element: block them with Stone Healing, or use Invulnerability. | 1200 | Stone | — |
Second Phase
| Attack | Power | Element | Status ailment |
|---|---|---|---|
| Contact | 1000 | Dark | — |
| Charge 2–4 times per cycle. It fades in on your half of the screen, backs up a little, then accelerates across to the other side, following your height up and down. Time a high jump in the middle of the screen to avoid it. A harder alternative: hug the wall on the side where it appears, and as soon as it fully appears, hold jump to jump as high as possible. | 2000 | Dark | — |
| Bats After the charges it becomes a single eye that circles the center of the room for about 13 s; this is the only chance to attack in the second phase. 8 bats surround the eye, and about every 2 s one flies straight at Nathan; bats can be destroyed but are replaced immediately. | 900 | Dark | — |
- For damage, the rules for kills while frozen or petrified, and how drop rates work, see Game Systems
Forms
| Forms | HP | EXP | Notes |
|---|---|---|---|
| First Phase | 3000 | — | — |
| Second Phase | — | — | Switches when HP drops to 1500 (half) or below, at the end of the current attack (HP is shared with the first phase) |
Strategy
- Recommended sub-weapon: Crucifix.
- First phase: recommended DSS is Stone Healing to deal with the meteors.
- In the first phase only the eye on its chest can be hit, and only while open; from the ground you need to jump to hit it.
- First phase: about 1 s after each appearance its eyes open and flash, and the flash position tells you the attack: both hands is Meteors, both sides of the eye is Laser, the mouths at its feet is Blood Cells. The three attacks are each used once per cycle, in random order.
- First phase: it appears on the left, center or right depending on where you stand. Height too: if you're on the ground it appears on the ground; if you're on a platform it appears beside the platform.
- Second phase: a full-screen DSS such as Summon Thunderbird is the most efficient. Alternatively, use Guided Shell to attack the eye automatically.
- In the second phase it alternates between Charge and Bats; it can only be attacked while the eye is out.